Introduction
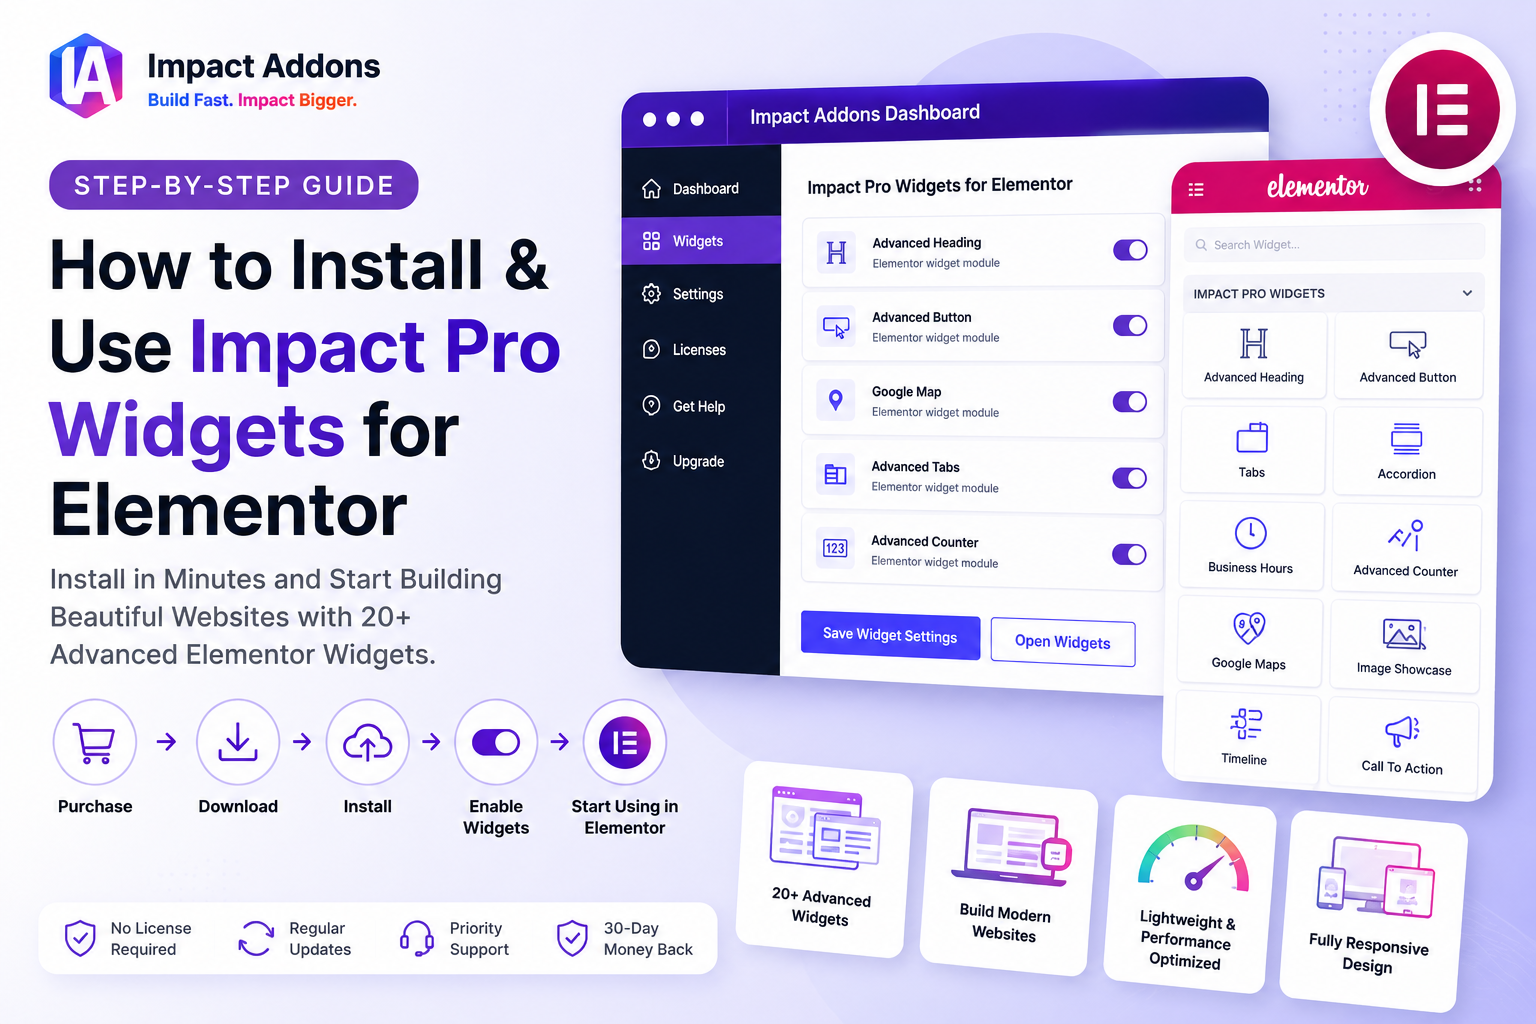
Impact Pro Widgets for Elementor extends Elementor with a collection of professional widgets designed to help you build modern, responsive, and feature-rich WordPress websites without writing code.
After purchasing the plugin, you can install it in just a few minutes and immediately start using advanced widgets like Advanced Heading, Tabs, Accordion, Google Maps, Timeline, Business Hours, Advanced Counter, Progress Bar, Call to Action, and many more.
This guide covers the complete setup process, including purchasing, downloading, installing, enabling widgets, and adding them inside Elementor.
Step 1 – Purchase Impact Pro Widgets for Elementor
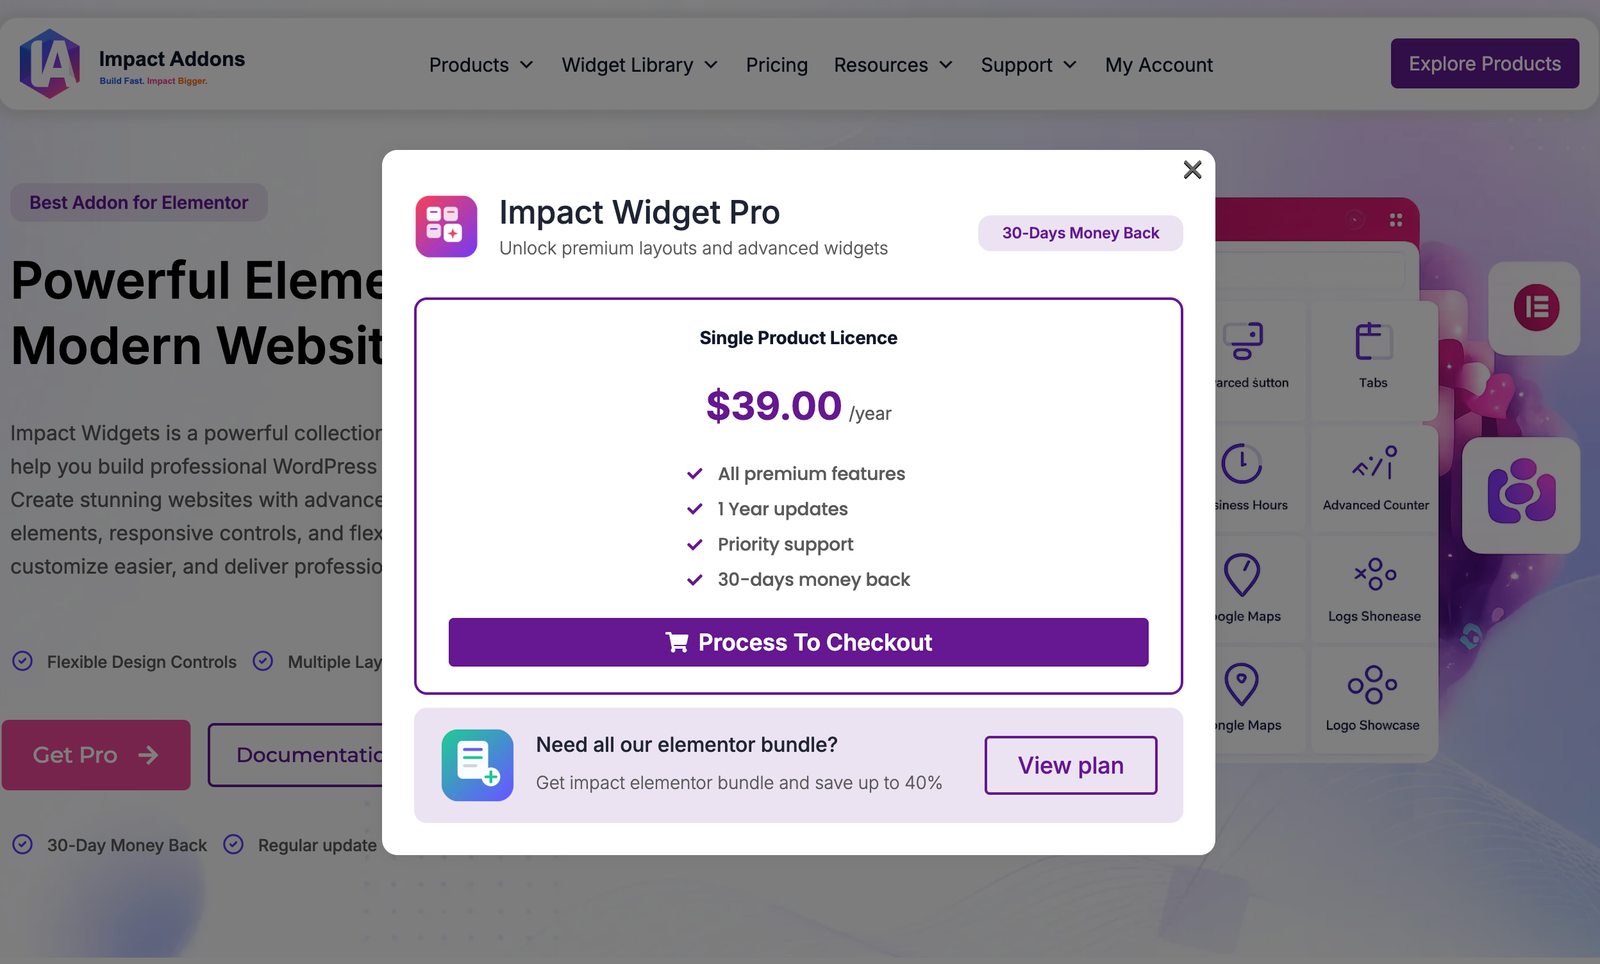
Before installing the plugin, you’ll need to purchase Impact Pro Widgets for Elementor.
There are two purchase options available.
Individual Plugin
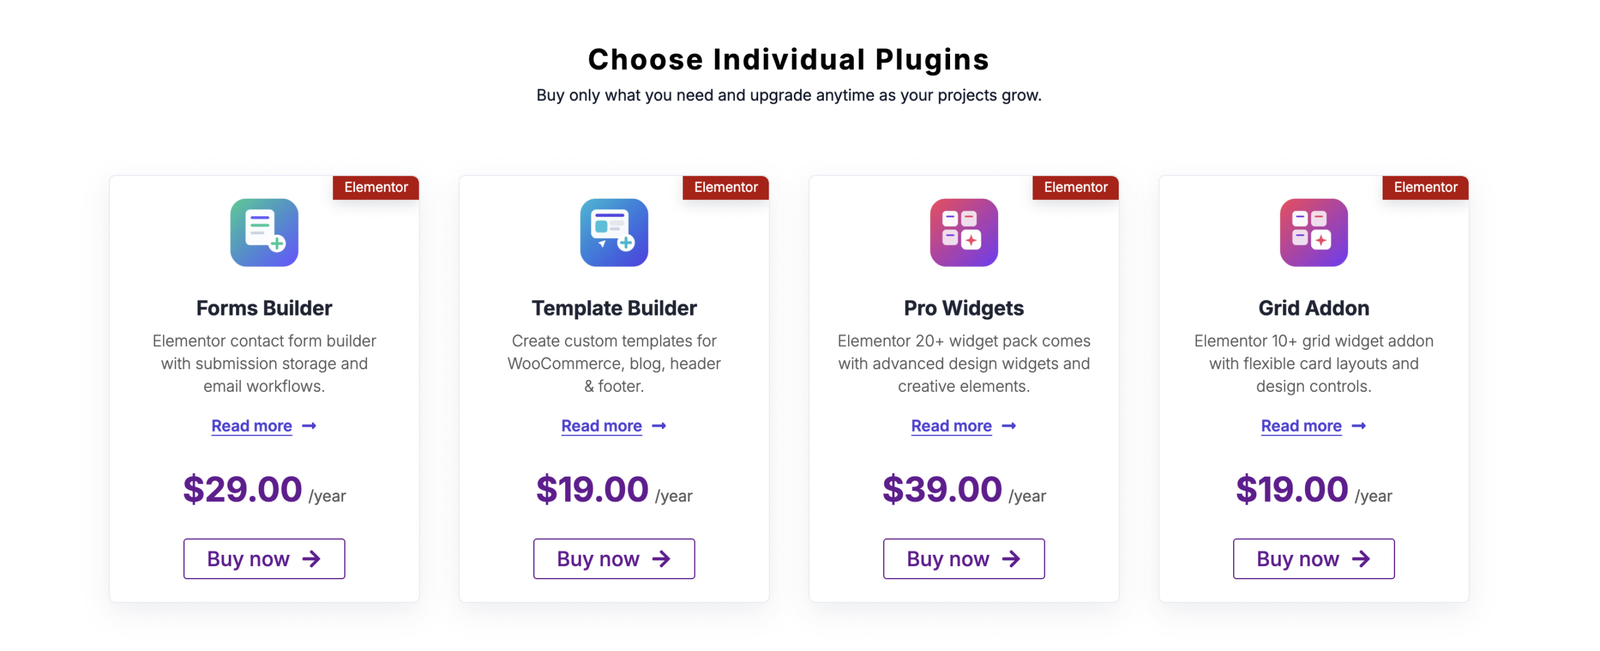
Purchase only Impact Pro Widgets if you only need advanced Elementor widgets.
You’ll receive:
- All Premium Widgets
- One Year Updates
- Priority Support
- 30-Day Money Back Guarantee
Elementor Bundle (Recommended)
If you want access to every Impact Addons plugin, choose the Elementor Bundle.
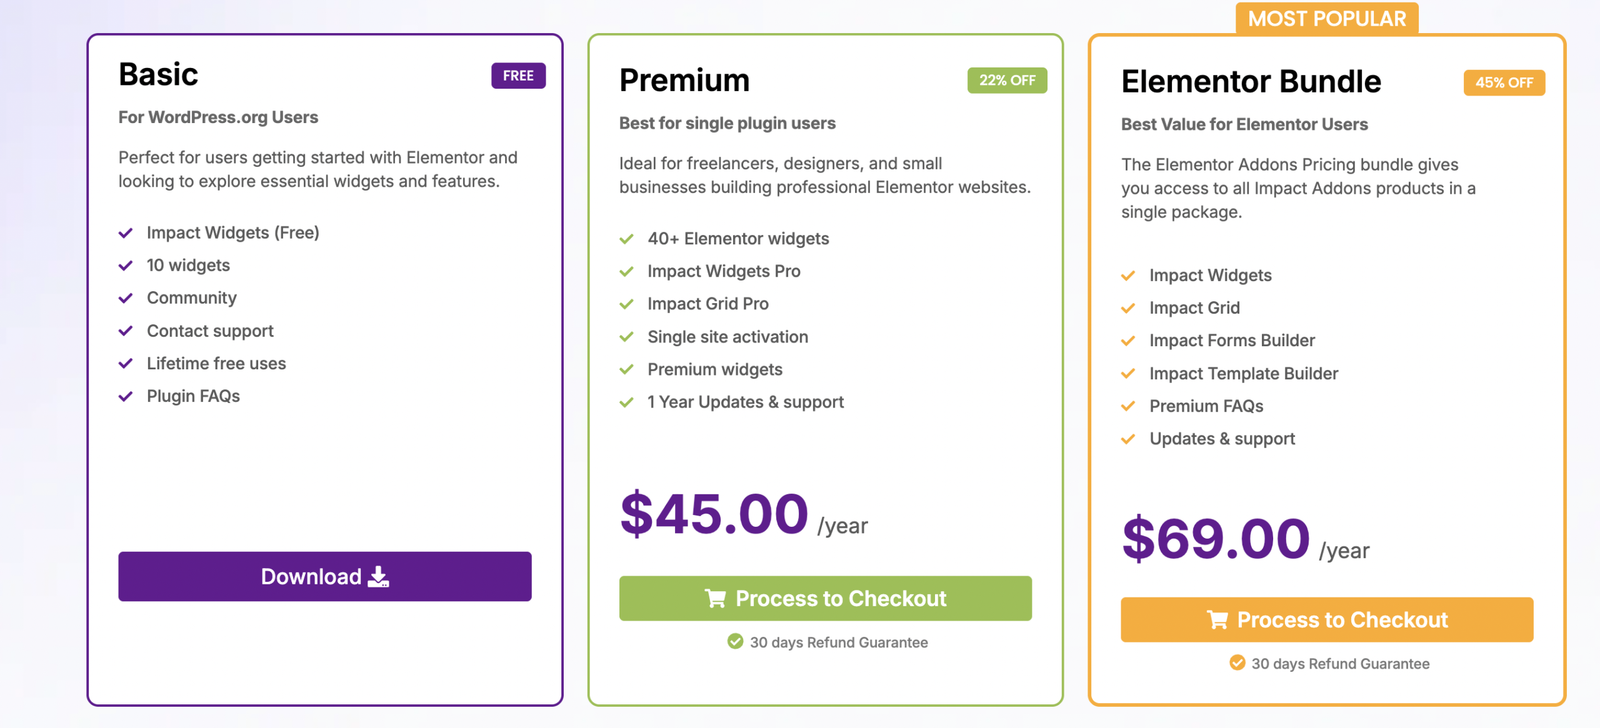
The bundle includes:
- Impact Pro Widgets
- Impact Template Builder
- Impact Forms
- Impact Grid Addon
This is the best option if you’re building complete Elementor websites.
Helpful Links
Pricing
https://impactaddons.com/pricing/
Impact Pro Widgets
https://impactaddons.com/impact-widgets-for-elementor/
Impact Forms
https://impactaddons.com/impact-forms-for-elementor/
Impact Template Builder
https://impactaddons.com/impact-template-builder/
Impact Grid Addon
https://impactaddons.com/impact-grid-addon-for-elementor/
Step 2 – Complete Checkout
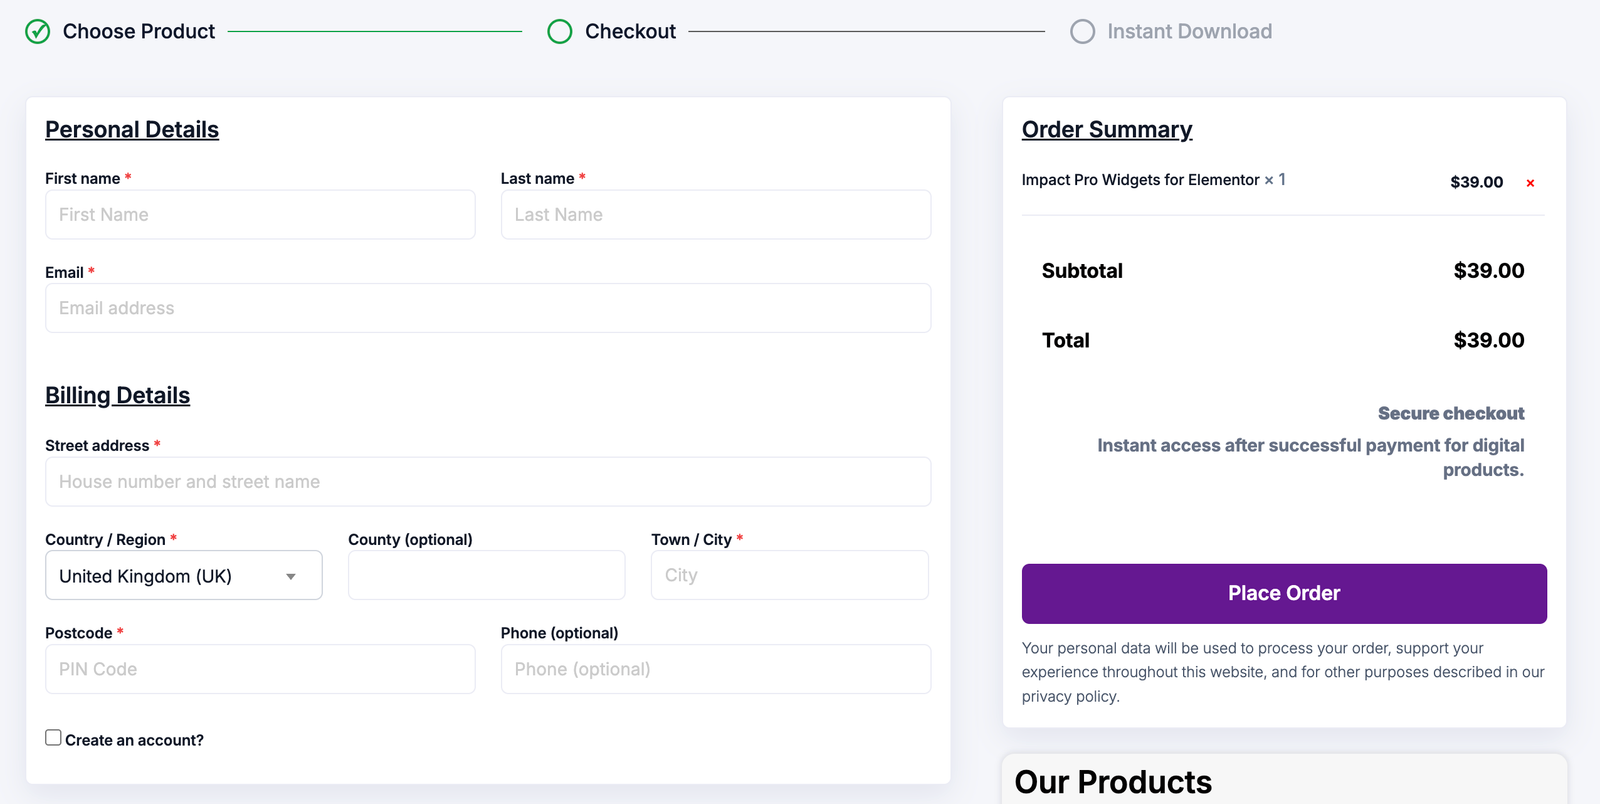
After clicking Process To Checkout, complete your order by entering your billing information.
Fill in your:
- First Name
- Last Name
- Email Address
- Billing Address
- Country
- City
- Postal Code
Review your order summary before clicking Place Order.
Once payment is successful, your download becomes instantly available.
Step 3 – Download & Install Impact Pro Widgets
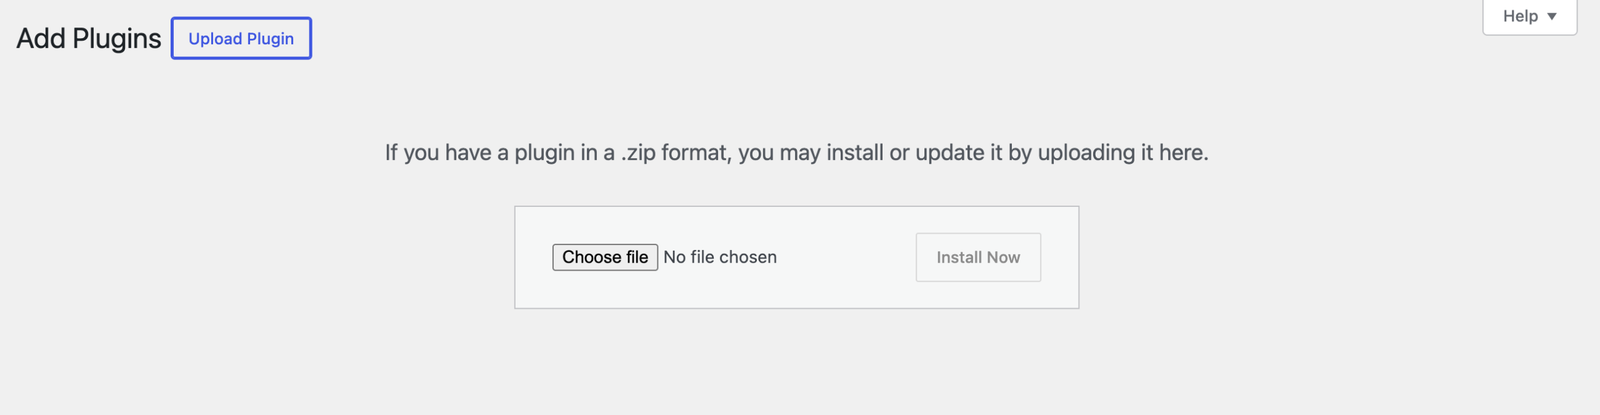
Download the ZIP file from:
- My Account
- Purchase Email
Next, log into your WordPress Dashboard.
Go to:
Plugins → Add New → Upload Plugin
Upload the ZIP file.
Click:
Install Now
After installation finishes, click:
Activate Plugin
Note: Impact Pro Widgets is ready to use immediately after activation.
Step 4 – Open the Impact Addons Dashboard
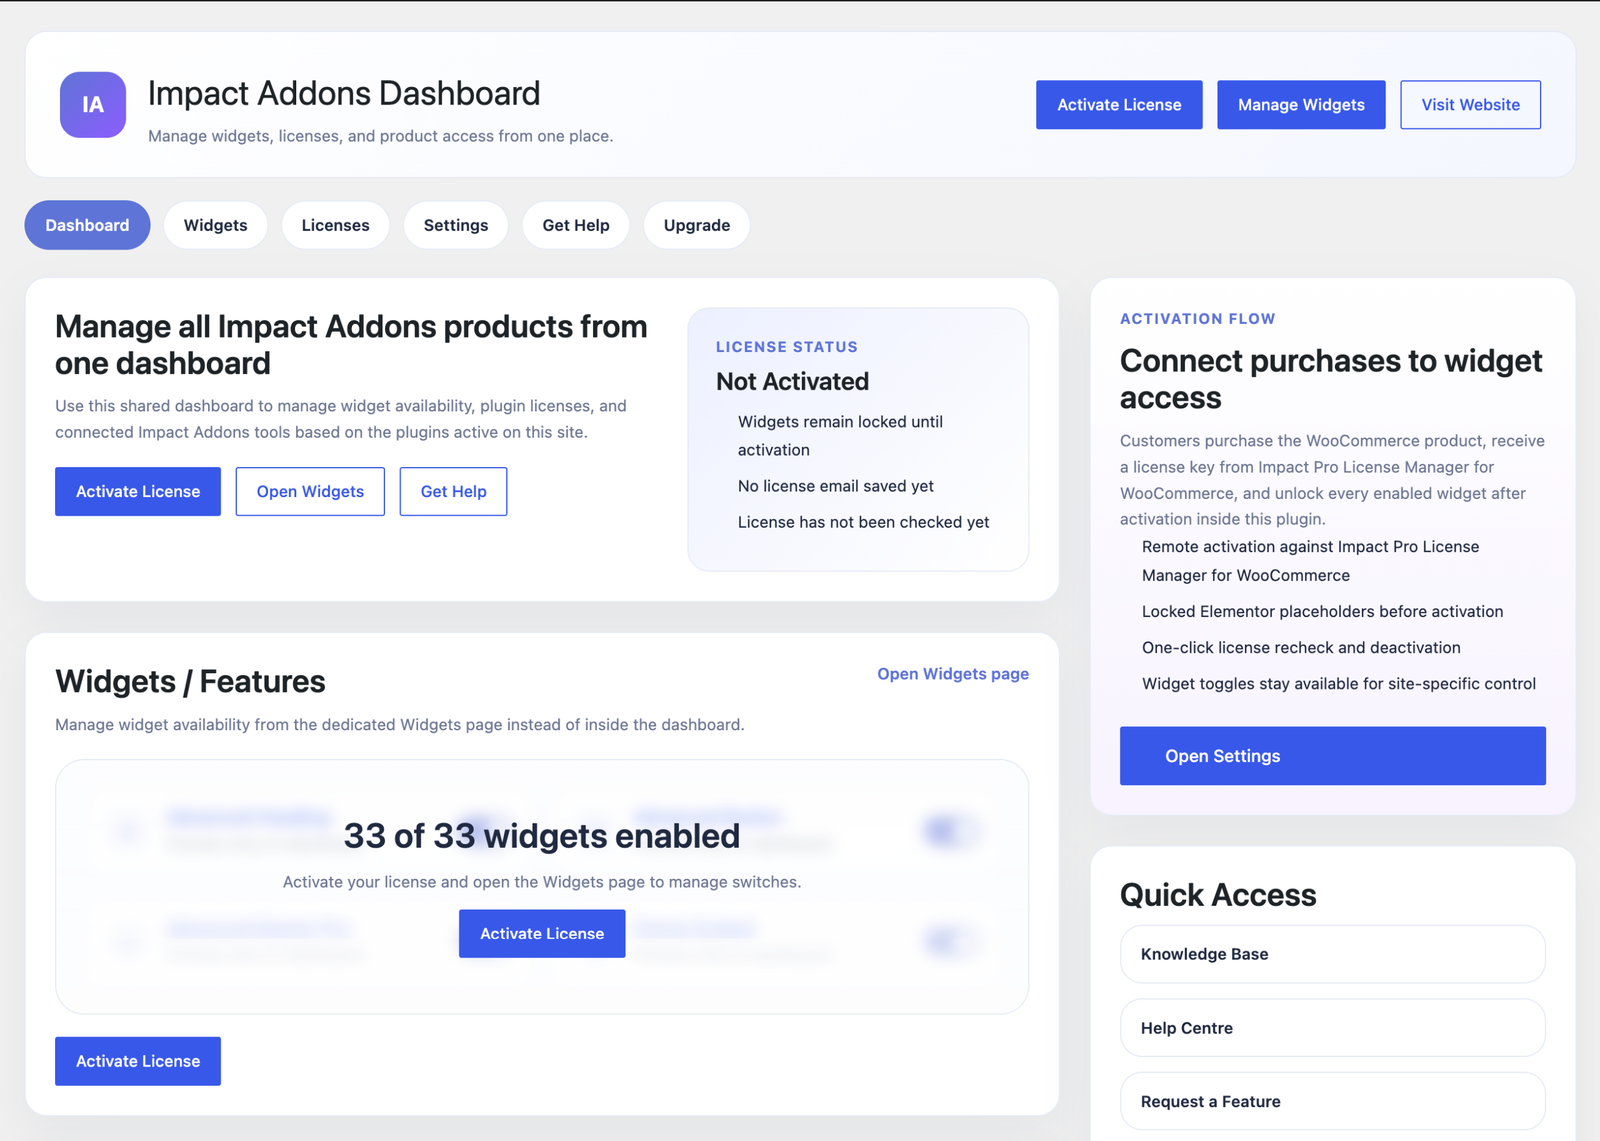
After activating the plugin, you’ll see the new Impact Addons Dashboard inside your WordPress admin.
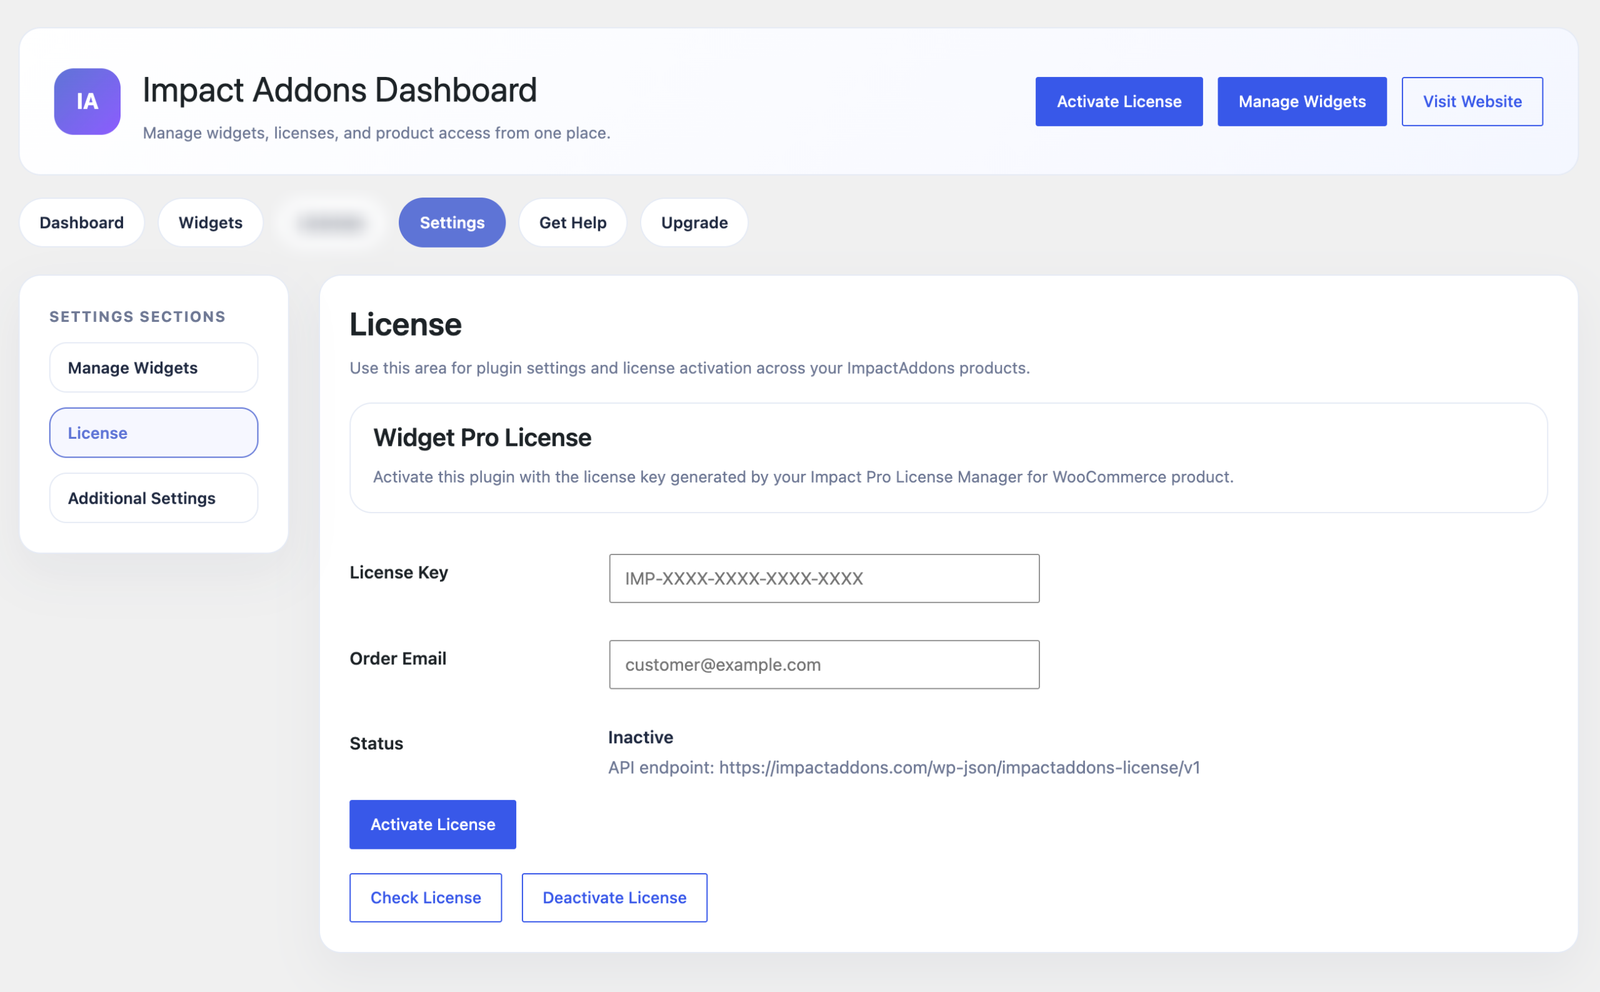
The dashboard provides quick access to:
- Dashboard Overview
- Widgets
- Settings
- Documentation
- Upgrade
- Help Centre
It also displays your installed Impact Addons products and provides shortcuts to manage them.
Step 5 – Manage Your Widgets
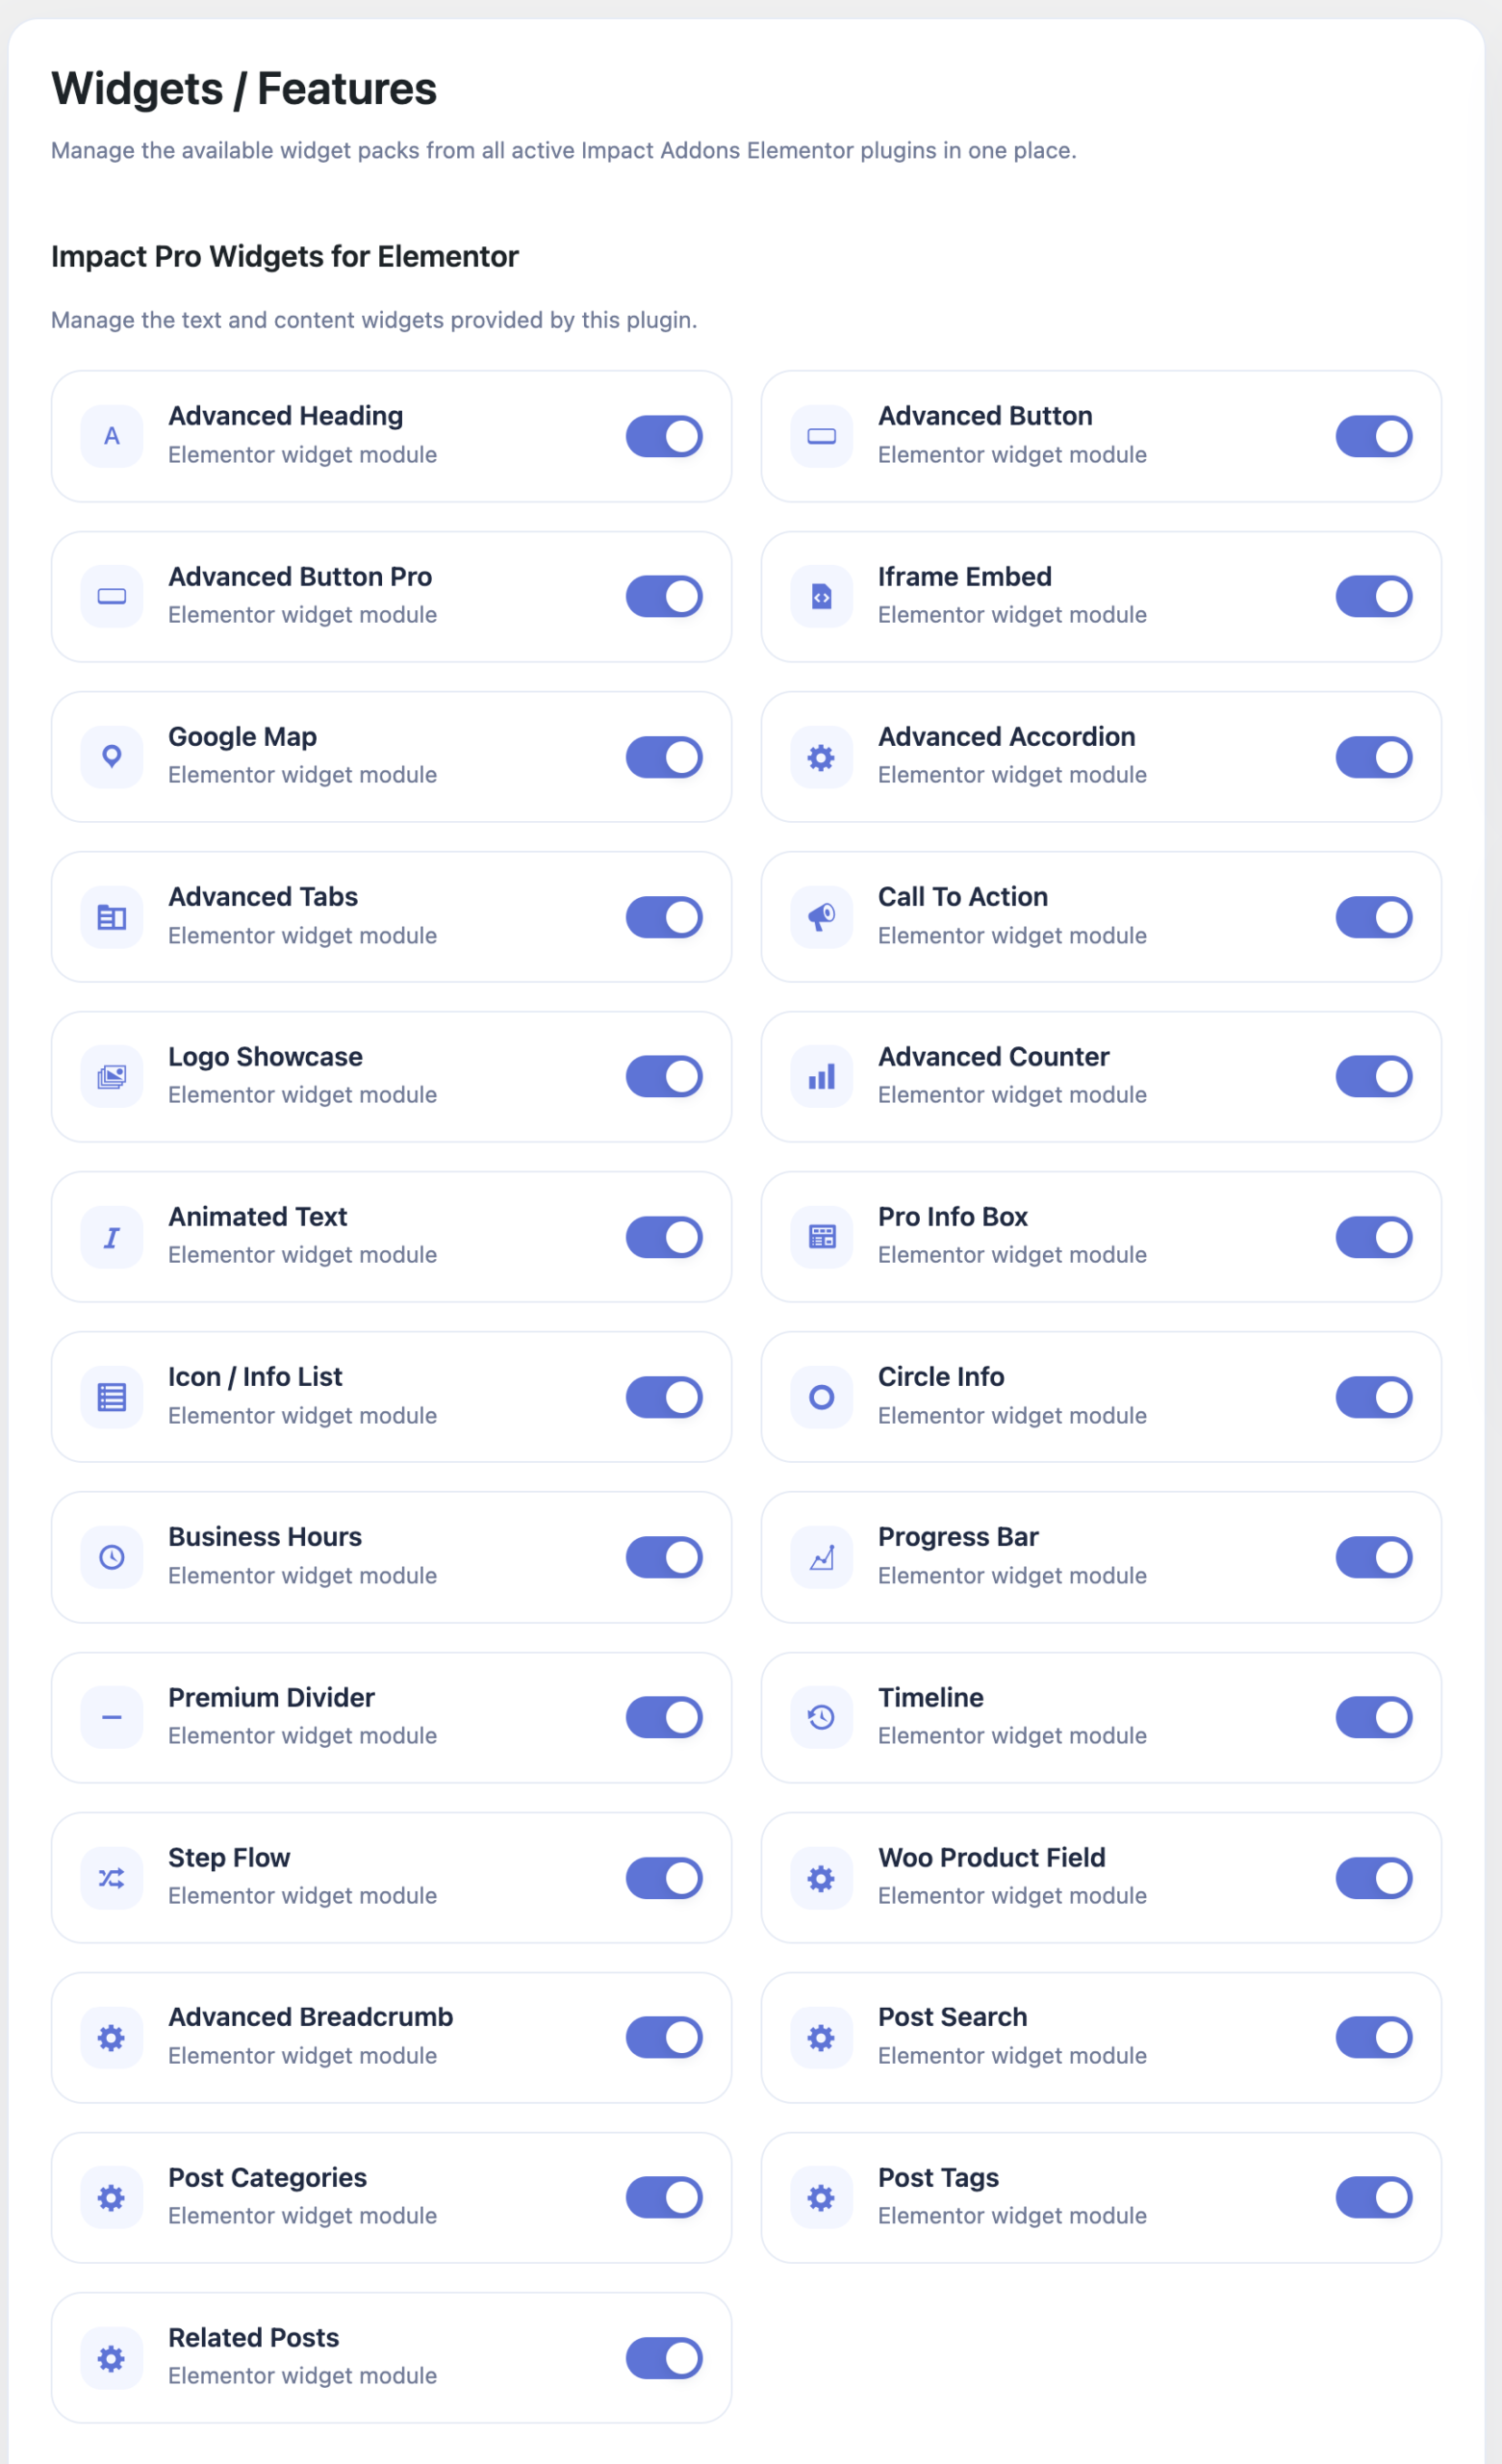
Open the Widgets page.
Here you can enable or disable individual widgets depending on your website requirements.
Keeping unused widgets disabled helps reduce unnecessary loading and keeps your Elementor editor clean and lightweight.
Don’t forget to click Save Widget Settings after making changes.
Step 6 – Start Using Impact Pro Widgets in Elementor
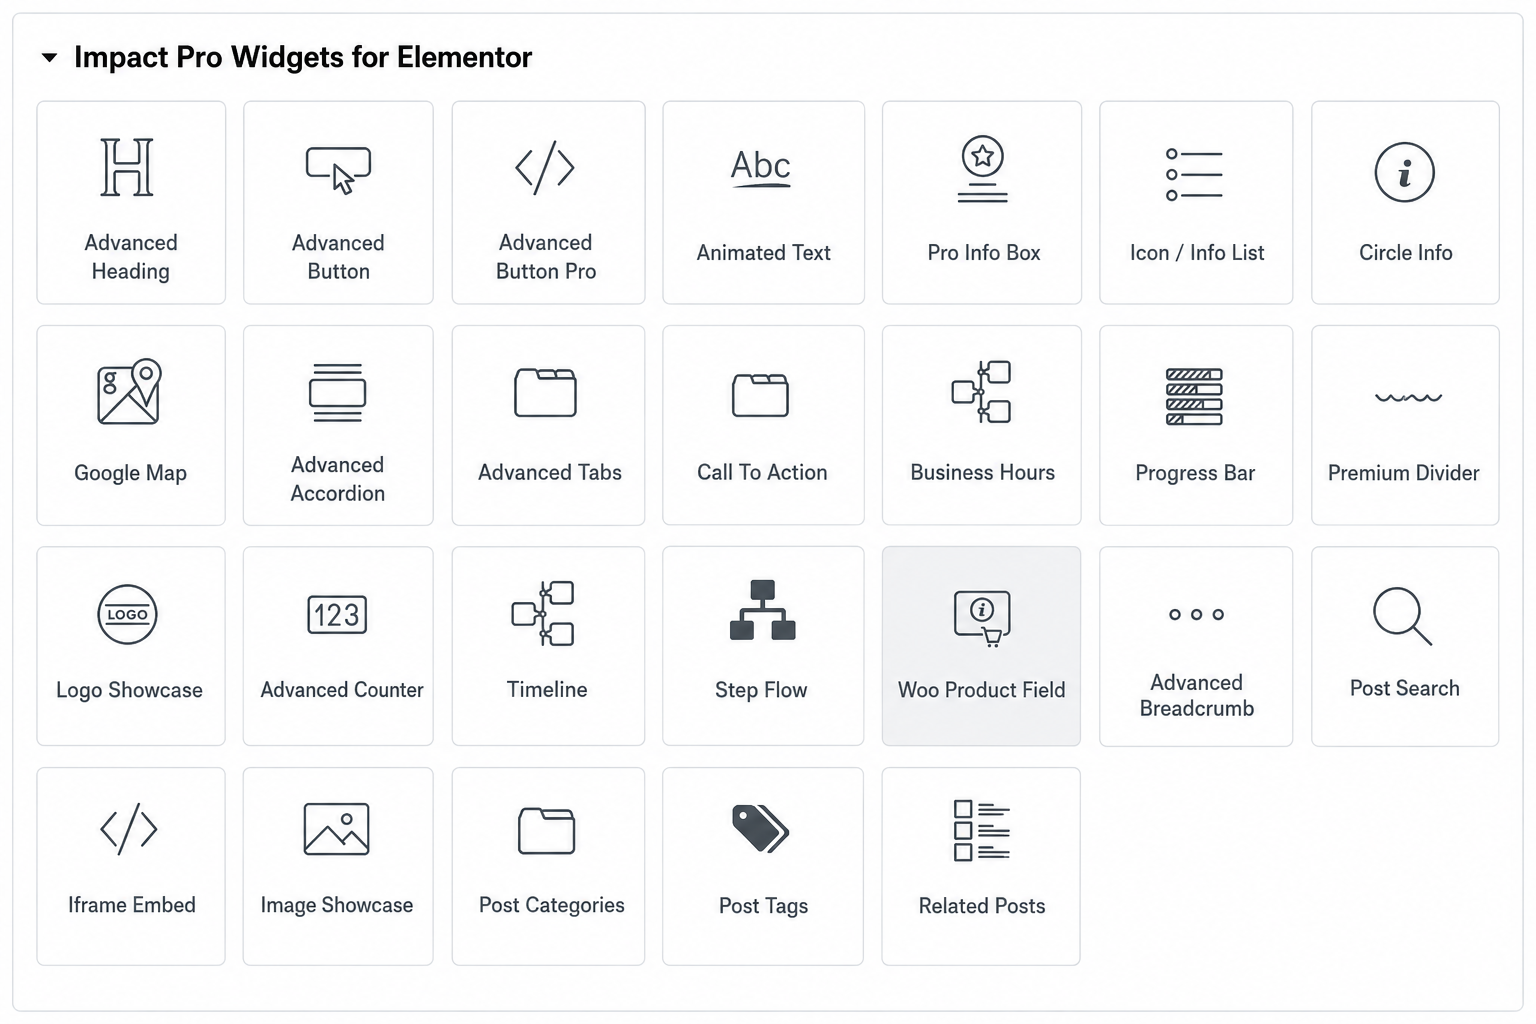
Open any page using Elementor.
Search for Impact Pro Widgets inside the Elementor widget panel.
You’ll find a growing collection of professional widgets including:
- Advanced Heading
- Advanced Button
- Advanced Button Pro
- Animated Text
- Pro Info Box
- Icon / Info List
- Circle Info
- Google Maps
- Advanced Accordion
- Advanced Tabs
- Call To Action
- Business Hours
- Progress Bar
- Premium Divider
- Logo Showcase
- Advanced Counter
- Timeline
- Step Flow
- Woo Product Field
- Advanced Breadcrumb
- Post Search
- Post Categories
- Post Tags
- Related Posts
- Iframe Embed
- Image Showcase
Simply drag any widget onto your page and customize it using Elementor’s visual editor.
What’s Next?
Now that you’ve installed Impact Pro Widgets for Elementor, you’re ready to build professional Elementor pages.
Continue with our detailed widget tutorials to learn how each widget works and discover practical design examples.
Popular tutorials include:
- Advanced Heading Widget
- Advanced Tabs Widget
- Advanced Accordion Widget
- Google Maps Widget
- Timeline Widget
- Business Hours Widget
- Progress Bar Widget
- Advanced Counter Widget
Helpful Resources
Documentation
https://impactaddons.com/documentation/
Changelog
https://impactaddons.com/impact-addons-changelog/
Contact Support
https://impactaddons.com/contact/
Feature Request
https://impactaddons.com/feature-request/
Frequently Asked Questions
Do I need Elementor Pro?
No. Impact Pro Widgets works with Elementor and adds its own advanced widgets.
How many widgets are included?
The plugin includes more than 20 professional Elementor widgets, with additional widgets planned in future updates.
Can I disable unused widgets?
Yes. Individual widgets can be enabled or disabled from the Widgets settings page.
Where can I download updates?
Download the latest version anytime from your My Account page or the purchase confirmation email.
Where can I get help?
Visit our Documentation, Contact page, or submit a Feature Request if you need assistance.