


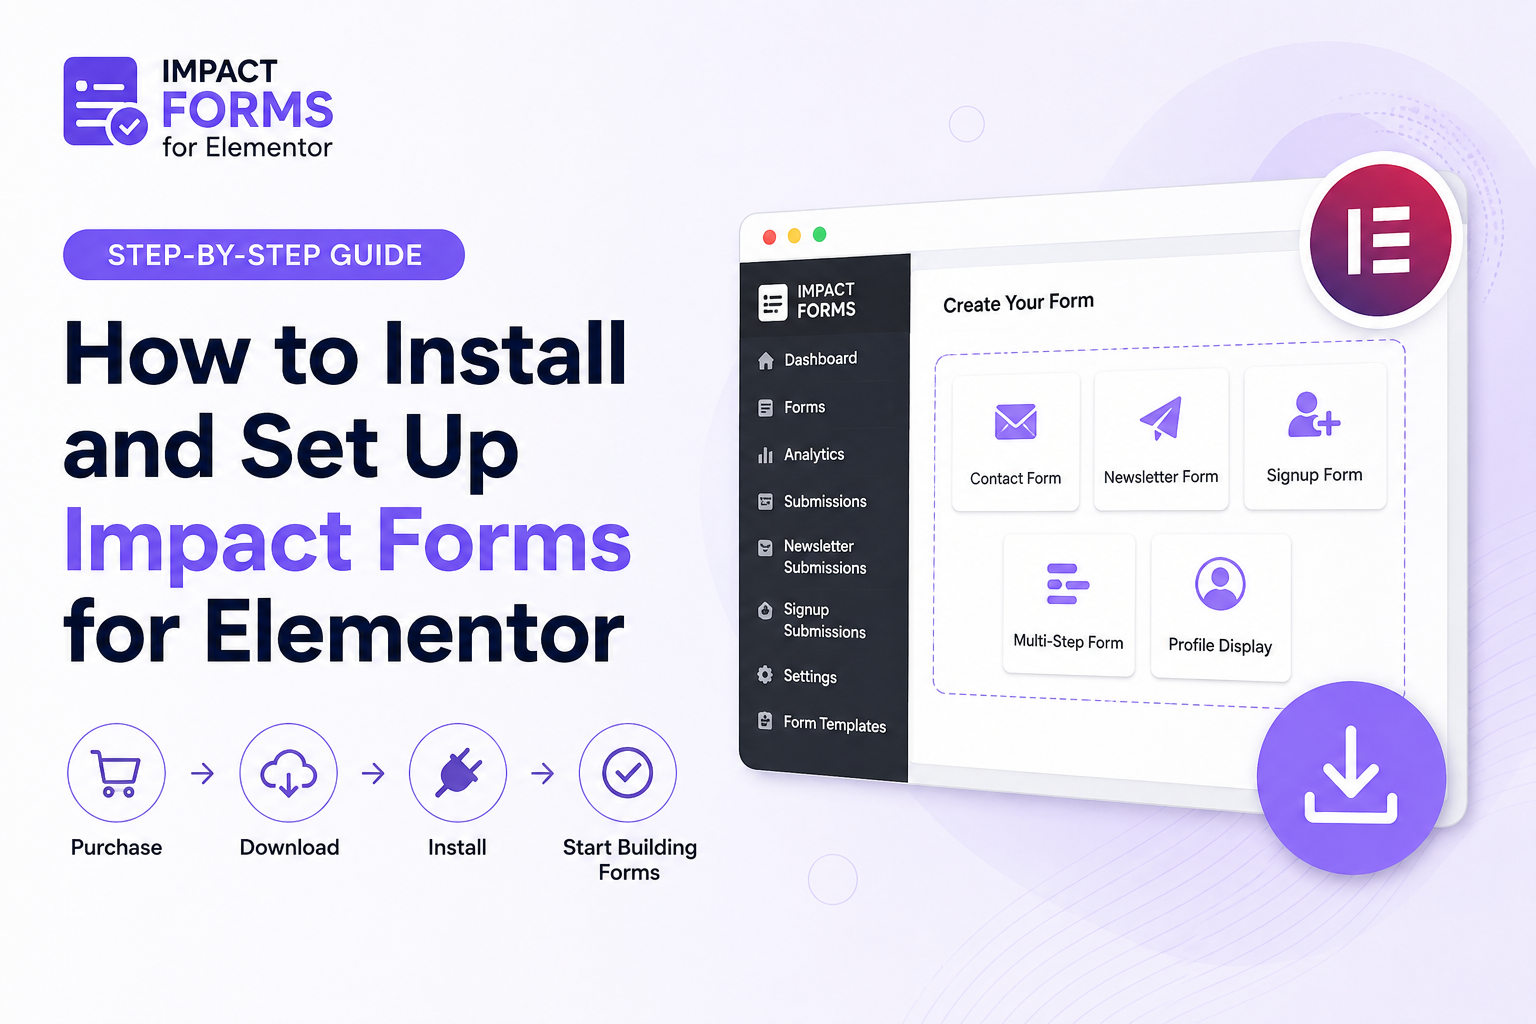
Impact Forms for Elementor is a professional form builder that helps you create contact forms, newsletter forms, signup forms, profile displays, and multi-step forms using Elementor. This guide explains how to install, activate, and start using Impact Forms for Elementor on your WordPress website.
This guide walks you through the complete process—from choosing the right plan and downloading the plugin to installing it on your WordPress website and accessing the available Elementor widgets.
Whether you purchased the standalone plugin or the complete Elementor Bundle, the setup process is simple and doesn’t require any license activation.
By the end of this guide, you’ll have Impact Forms installed and be ready to build your first form.
Make sure WordPress and Elementor are already installed. After purchasing Impact Forms, you’ll receive instant download access from your account and by email.
Step 1 – Choose the Right Plan
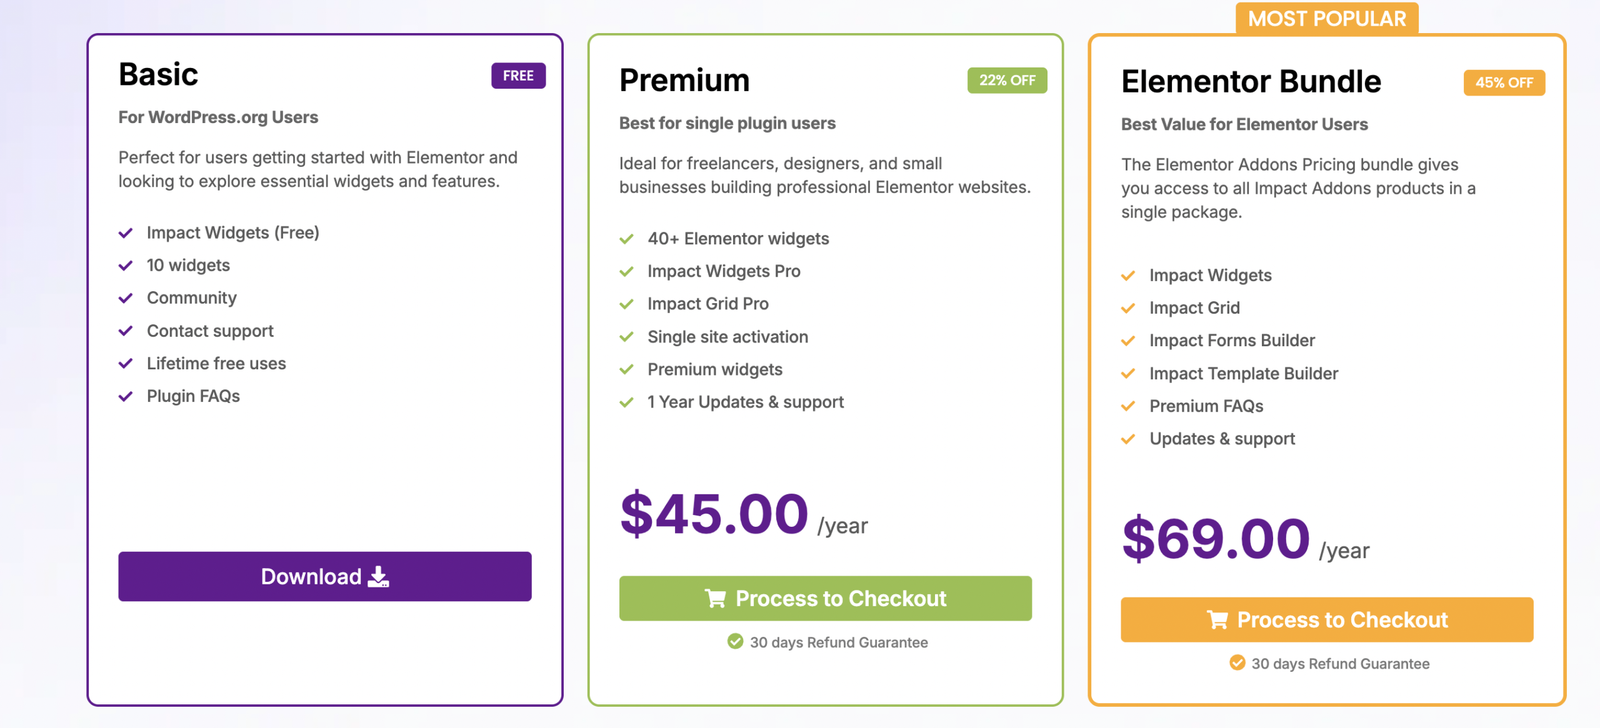
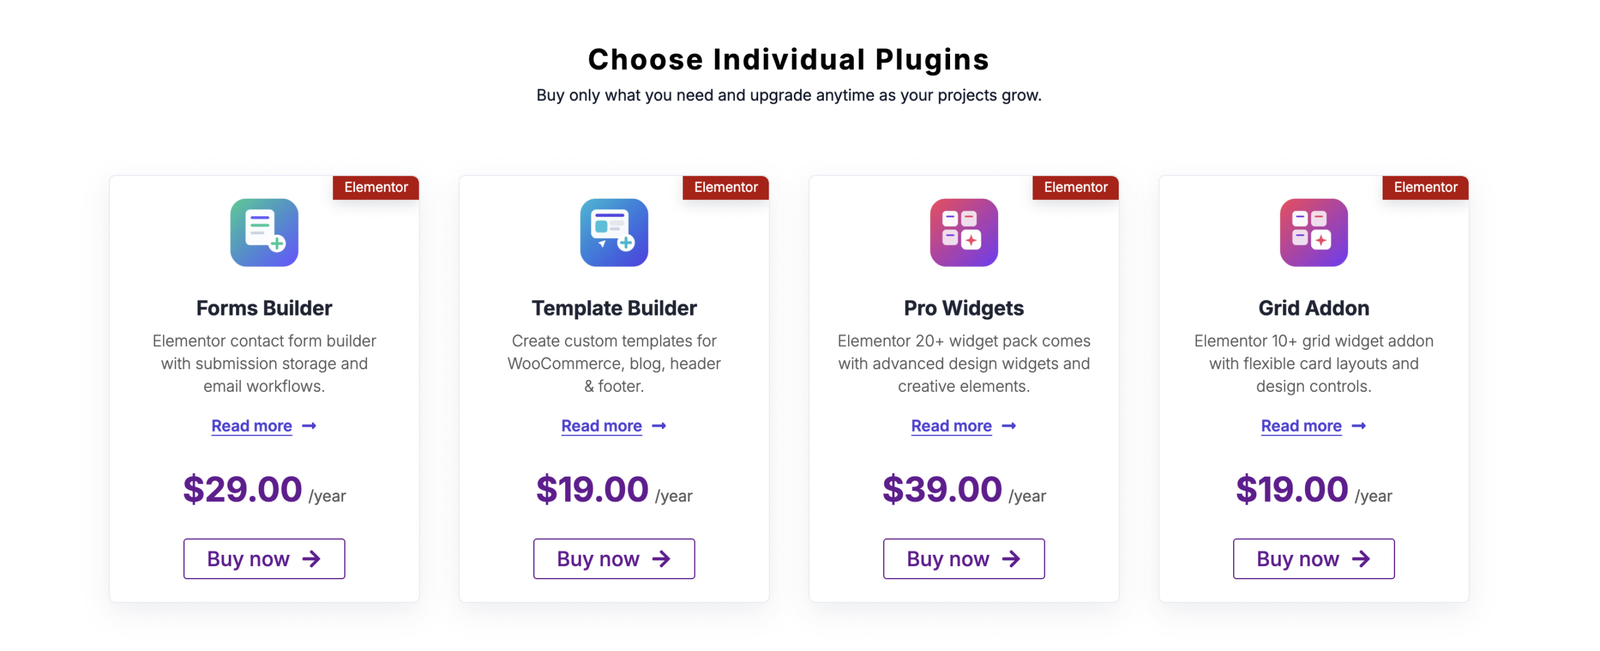
Before installing the plugin, you’ll need to purchase Impact Forms.
There are two ways to get the plugin.
Option 1 – Impact Forms
If you only need a professional Elementor Form Builder, purchase Impact Forms. It includes all premium form features, one year of updates, priority support, and a 30-day money-back guarantee.
Option 2 – Elementor Bundle
If you’re building multiple Elementor websites, the Elementor Bundle offers better value.
It includes:
This option allows you to build forms, custom templates, advanced widgets, and dynamic grid layouts using a single bundle.
Related Links
Step 2 – Purchase Impact Forms
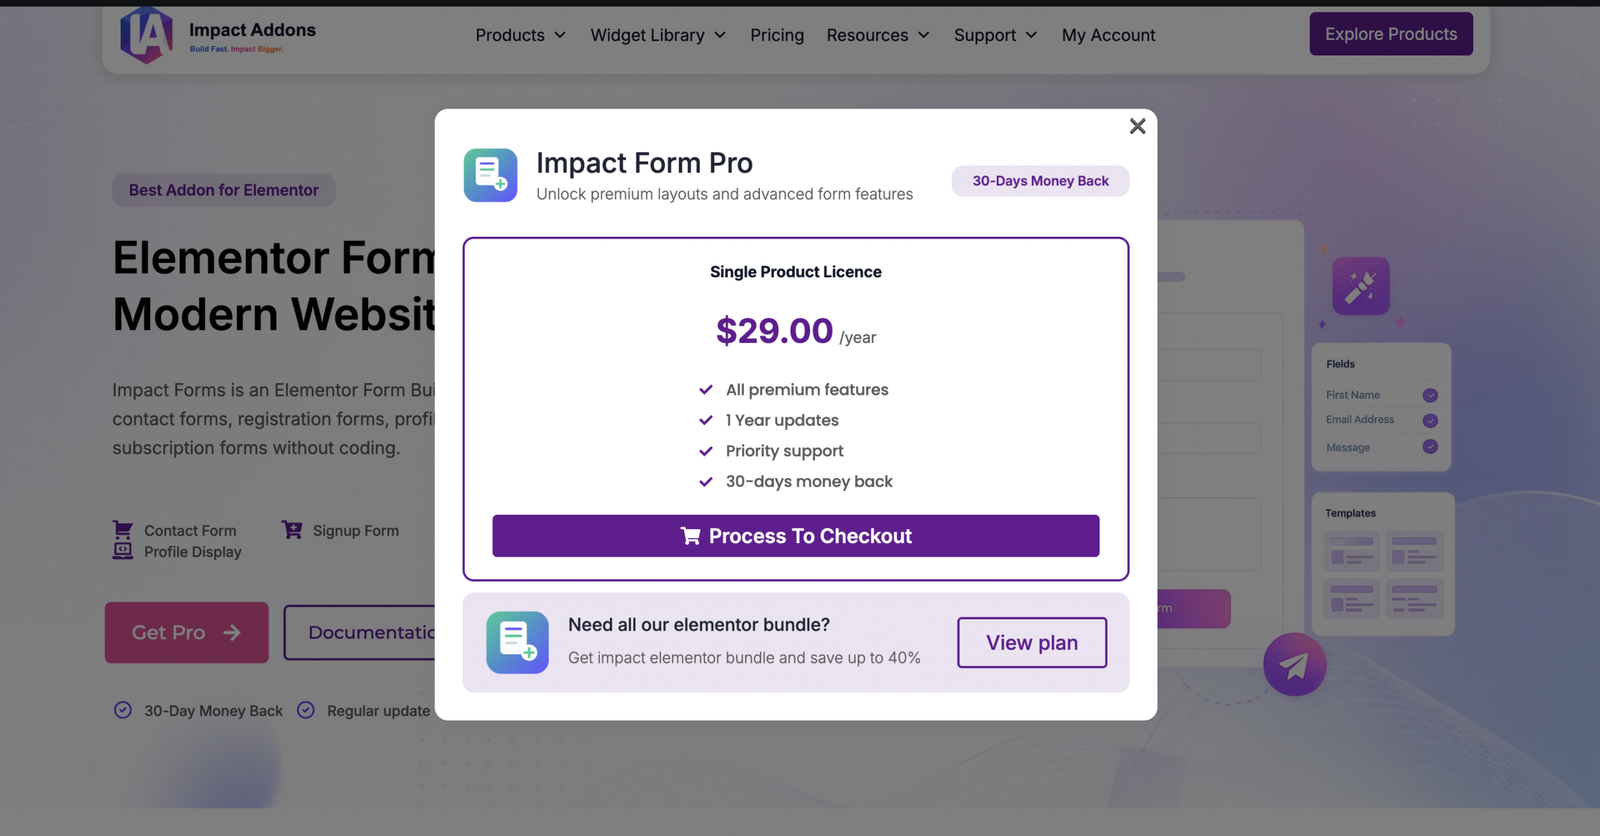
After selecting your preferred plan, click Get Pro or Buy Now.
A purchase popup displays your selected license, pricing, premium features, update period, support information, and money-back guarantee.
Review your order and click Proceed to Checkout.
Your purchase is processed through our secure checkout system, ensuring a fast and safe transaction.
Step 3 – Complete Checkout
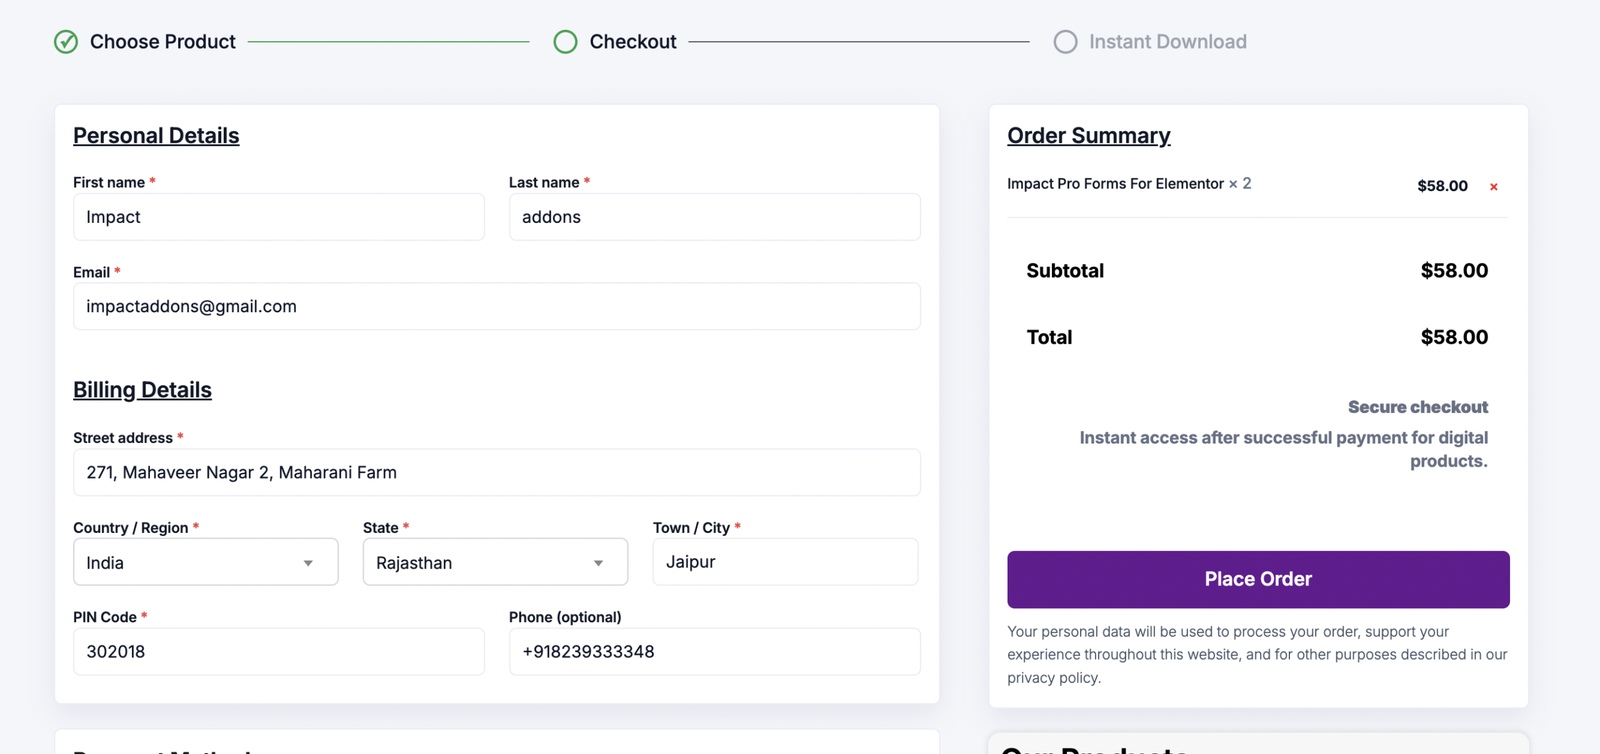
Complete the checkout form by entering your billing information.
Required information includes:
- First Name
- Last Name
- Email Address
- Billing Address
- Country
- State
- City
- Postal Code
Review your order summary before clicking Place Order.
Once your payment is successfully processed, you’ll immediately receive access to your download.
Step 4 – Download Your Plugin
After completing your purchase, there are two ways to download the plugin.
Option 1
Download it directly from My Account.
Option 2
Use the download link sent to your registered email address. Save the ZIP file to your computer. You’ll use this file during installation.
Step 5 – Install Impact Forms for Elementor
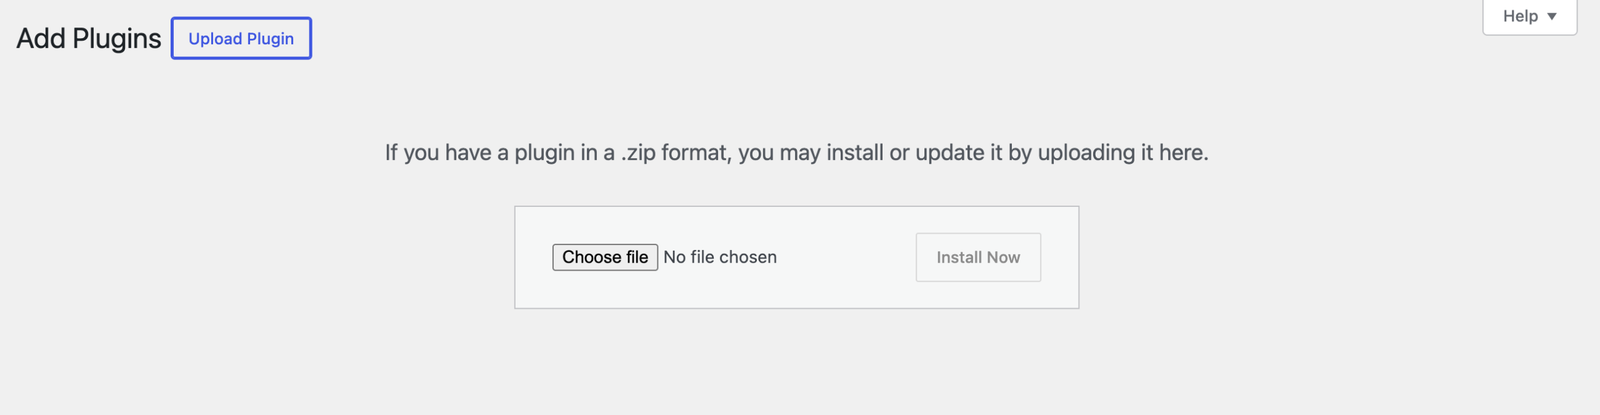
Log in to your WordPress dashboard.
Navigate to
Plugins → Add New → Upload Plugin
Click Choose File and select the ZIP file you downloaded earlier.
Click Install Now.
After installation finishes, click Activate Plugin.
Unlike many premium plugins, Impact Forms does not require license activation before use.
Once activated, the plugin is immediately available.
Step 6 – Explore the Impact Forms Dashboard
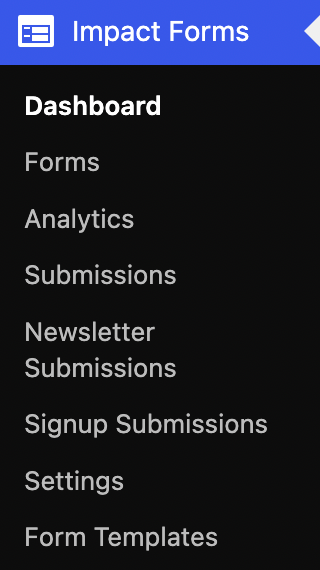
After activation, a new Impact Forms menu appears inside your WordPress dashboard.
The dashboard gives you quick access to every major feature.
Dashboard
View your plugin overview and important information.
Forms
Create and manage all Elementor forms.
Analytics
Monitor form performance and submission statistics.
Submissions
View all contact form entries in one place.
Newsletter Submissions
Manage subscribers collected through newsletter forms.
Signup Submissions
Review registrations submitted through signup forms.
Settings
Configure your global form settings.
Form Templates
Access ready-made templates to speed up form creation.
Step 7 – Use Impact Forms for Elementor Widgets
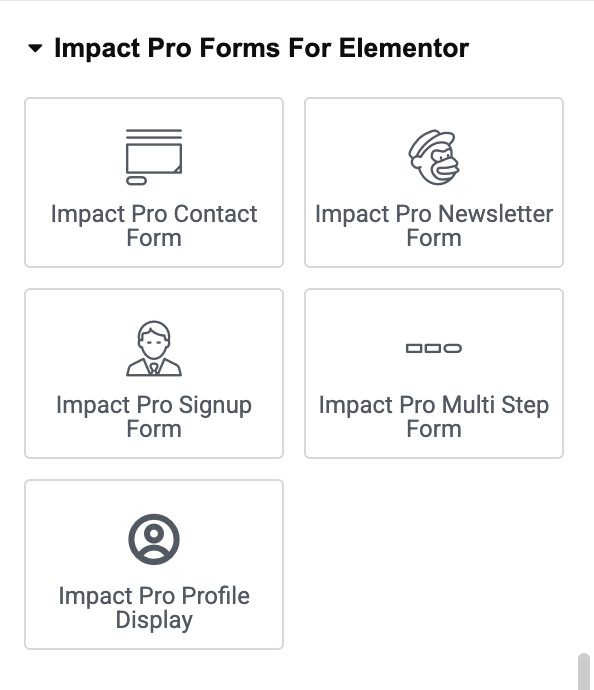
Open any page using Elementor.
Search for Impact Forms inside the Elementor widget panel.
You’ll find several widgets including:
- Contact Form
- Newsletter Form
- Signup Form
- Multi-Step Form
- Profile Display
Simply drag the widget onto your page and customize it using Elementor’s visual editor.
You are now ready to create your first form.
Helpful Resources
Need additional help?
Visit these pages:
Frequently Asked Questions
Do I need Elementor Pro?
No. Impact Forms works with Elementor.
Do I need a license key?
No. Simply install and activate the plugin.
Where can I download the plugin again?
You can download it anytime from your My Account page or the email you received after purchase.
What’s included in the Elementor Bundle?
The Elementor Bundle includes Impact Forms, Template Builder, Pro Widgets, and Grid Addon.
Where can I report a bug or request a feature?
Visit the Feature Request page or contact our support team.